Category: LINE OA
-
Line Chatbot with Dialogflow and Make.com Part 2
Before you begin, you should initially set up your LINE OA with Dialogflow. You may build and connect them through this tutorial:
https://www.youtube.com/watch?v=qHKCgCusee4&list=PLyOJN_bAzw3jcOxupqianlvqM9f_rwW1gThis article will present a guide to integrating LINE Chatbot with Dialogflow and Google Gemini AI, using the Make.com platform as an intermediary to connect workflows. The core principle is to leverage Dialogflow’s conversation management capabilities, Google Gemini AI’s advanced natural language processing power, and Make.com’s automation workflow creation flexibility to create a smarter and more natural conversational experience on LINE.
You can learn more about Make.com courses from the official website (Make.com Academy) at https://academy.make.com/pages/search
The content in this article is divided into 5 stages. as follows
- Start creating a workflow with Make.com
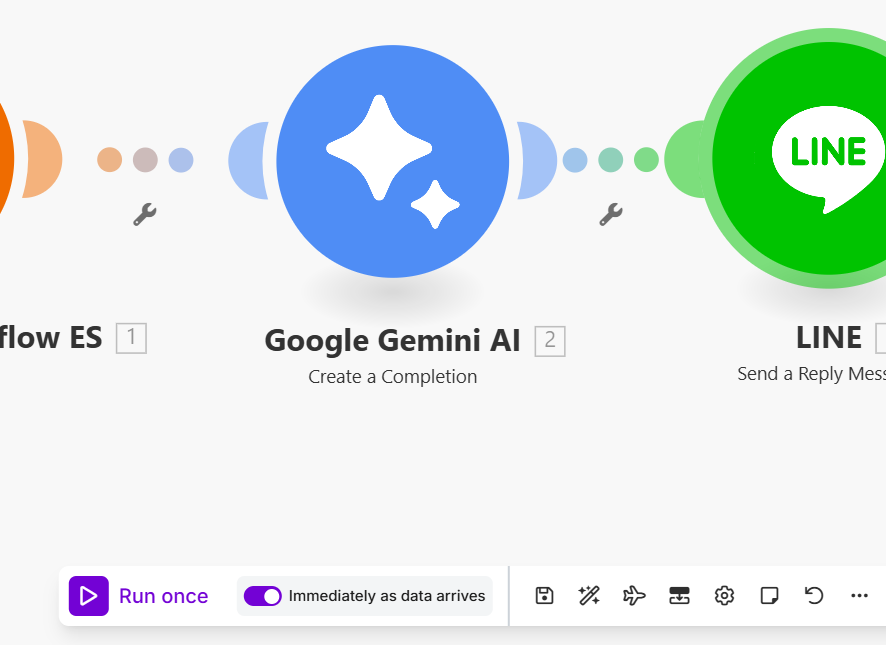
- Implementation of the “Google Cloud Dialogflow ES (Watch for Fulfillment)” module
- Manage Responses in Default Fallback Intent and Enable Fulfillment
- Using the “Google Gemini AI (Create a completion)” module
- Using the “LINE (Send a Reply Message)” Module
1. Start creating a workflow with Make.com
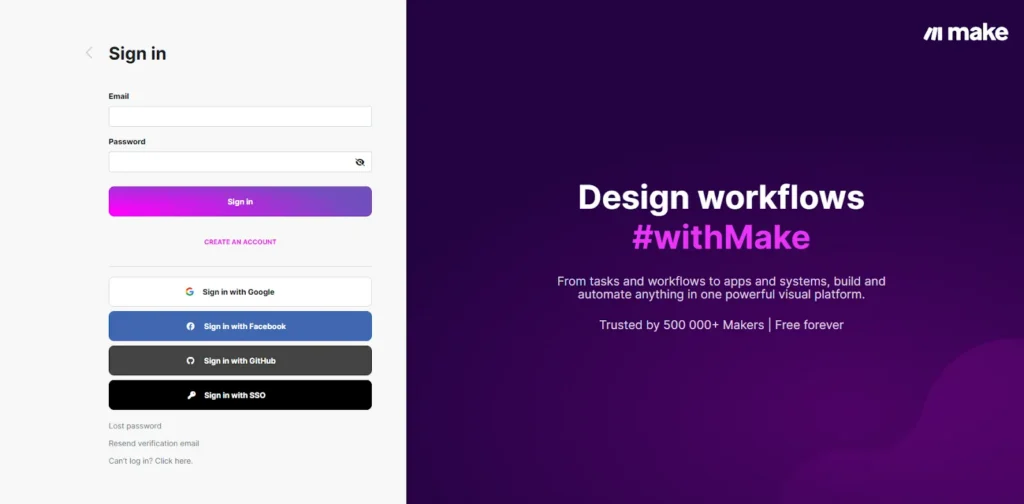
Go to the URL: https://www.make.com/ will appear on the screen, as shown in the image.
Complete the login registration, you will find this screen.
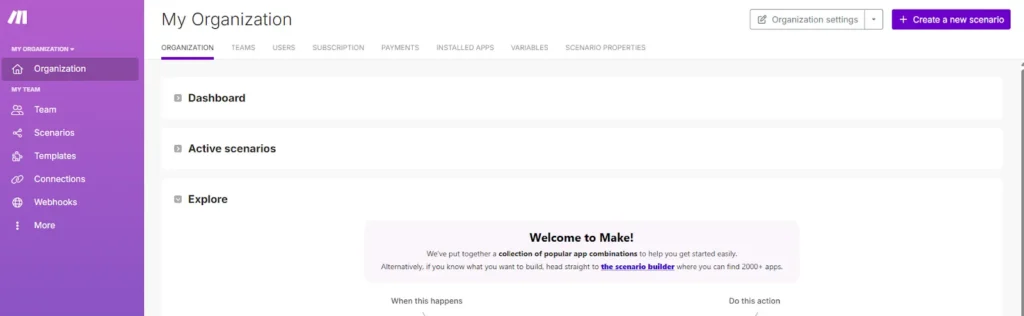
Press the Create a new scenario button on the top right of the screen, and the screen will appear. There will be Apps or Modules to choose from, as shown in the picture.

2. Implementation of the “Google Cloud Dialogflow ES (Watch for Fulfillment)” Module
Search for the Google Cloud Dialogflow ES module by typing in the search box as shown in the image.
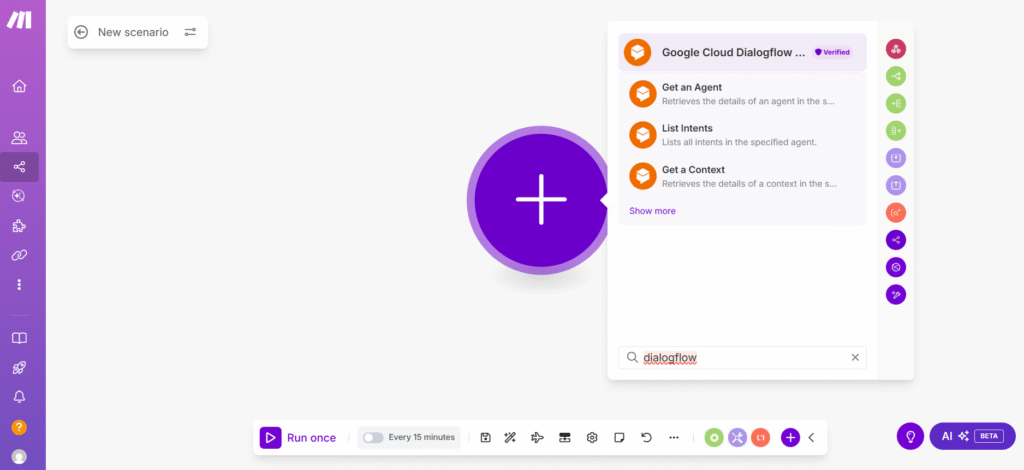
Then, click Show more to display all the results and select “Watch for Fulfillment” as shown in the image.
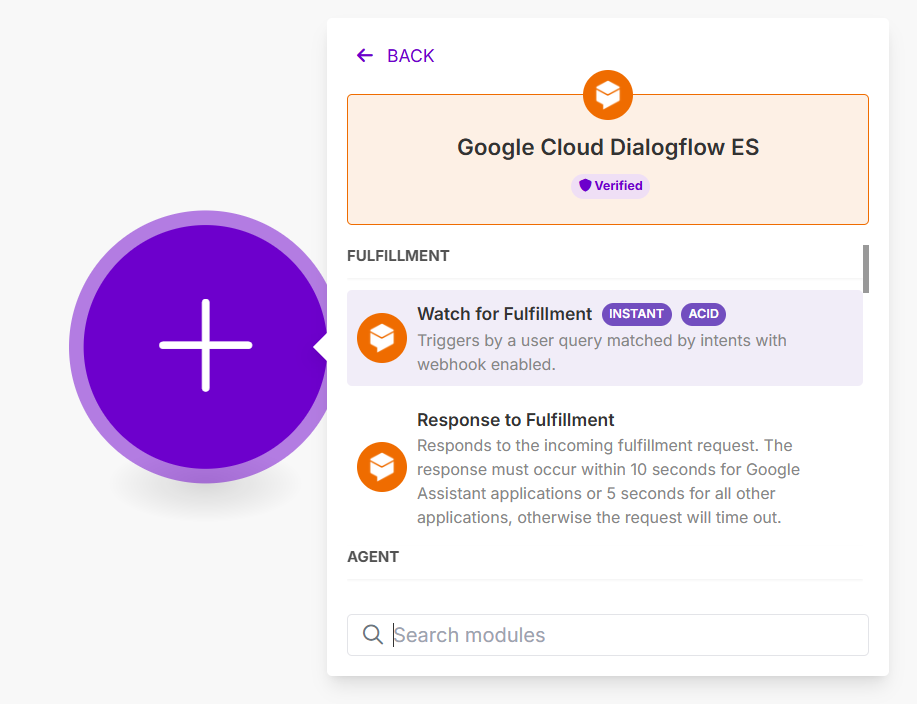
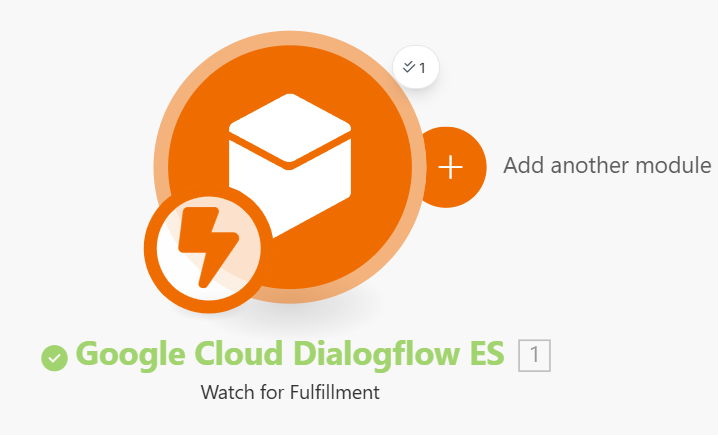
Once selected, you will get the module you want, as shown in the picture.
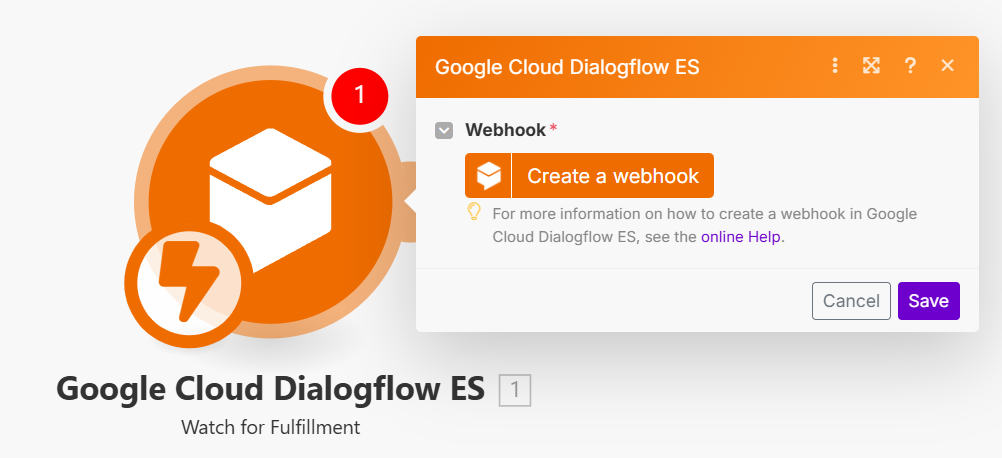
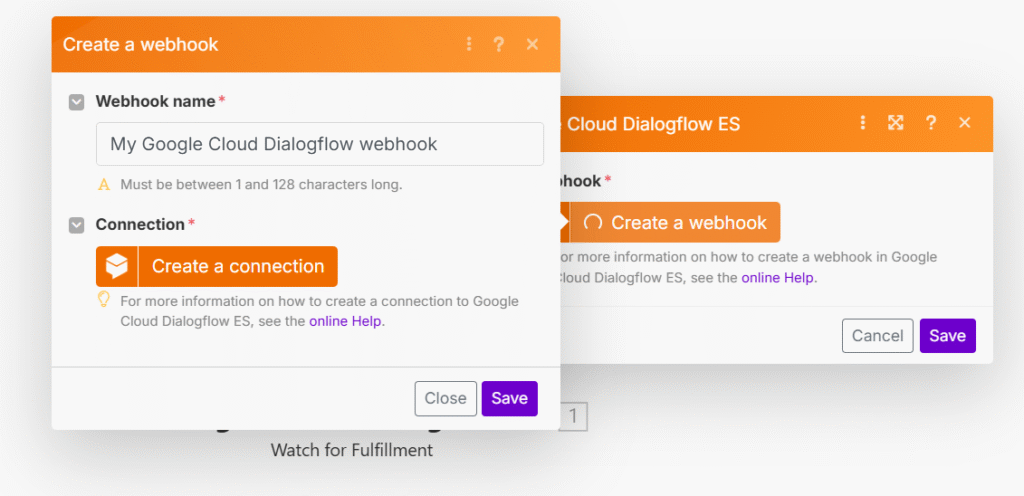
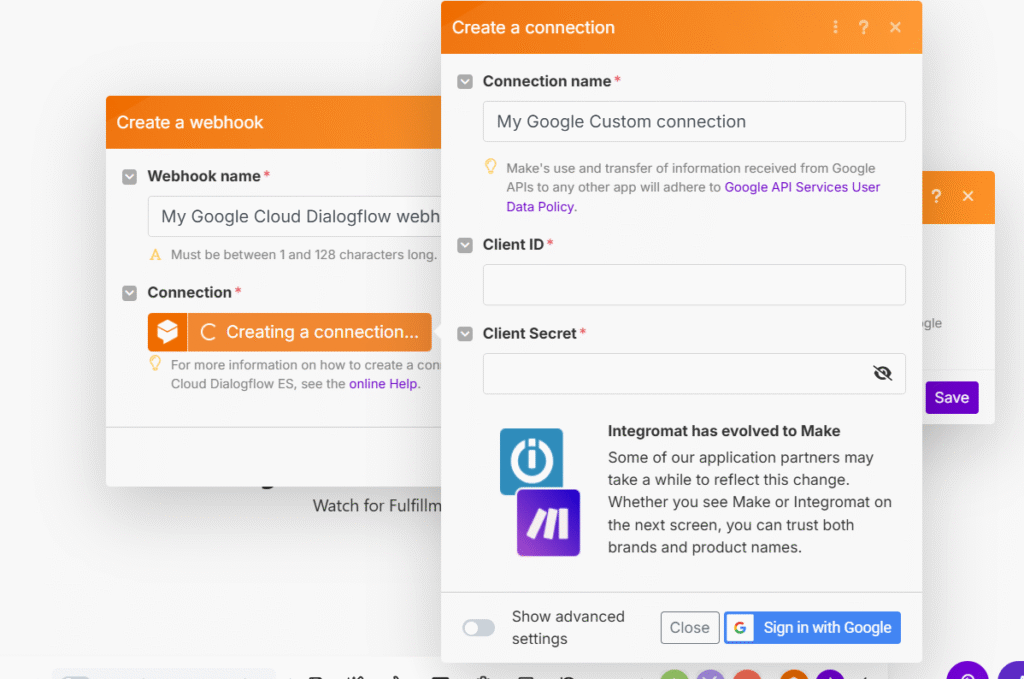
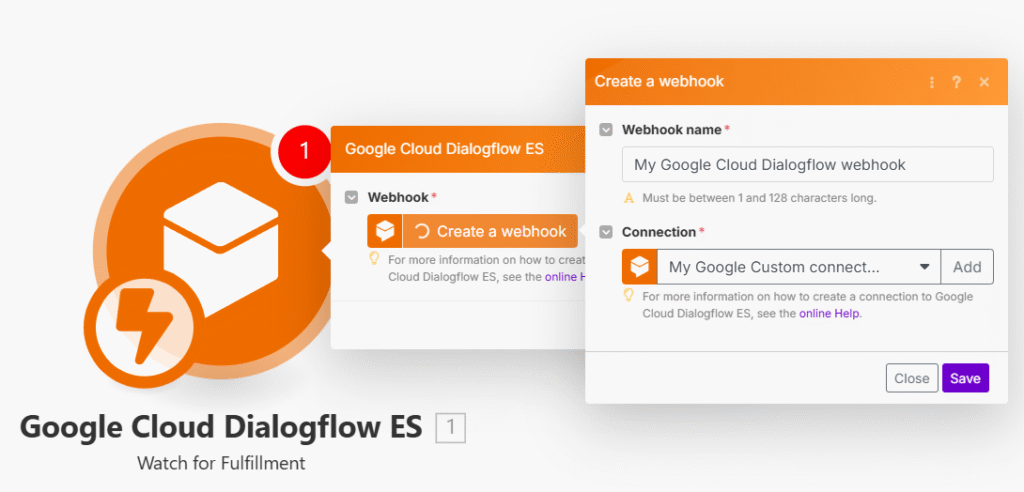
Then, press the “Create a webhook” button, name the Webhook name, and press the “Create a connection” button as shown in the picture.
When the button is pressed, a screen will appear to enter the Client ID and Client Secret as shown in the picture.
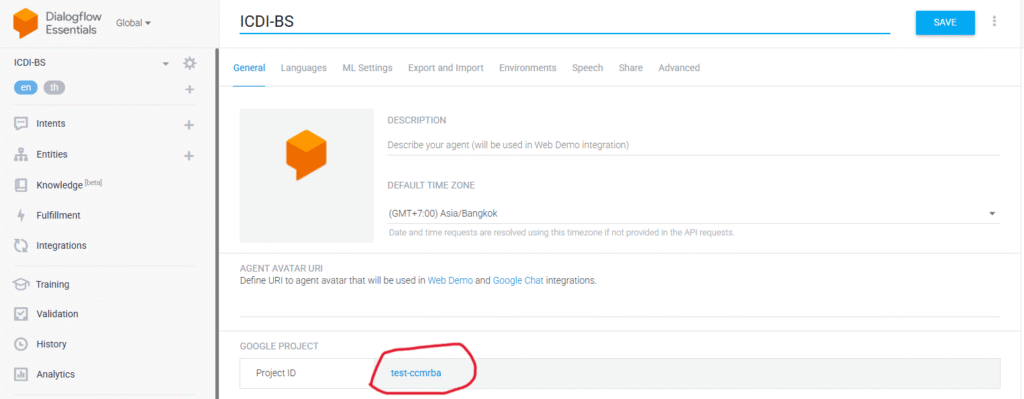
We need to find the Client ID and Client Secret from Google Cloud Platform, go to URL: https://console.cloud.google.com/ and select the Project to create the agent in Dialogflow, or go back to Dialogflow and press the gear symbol.
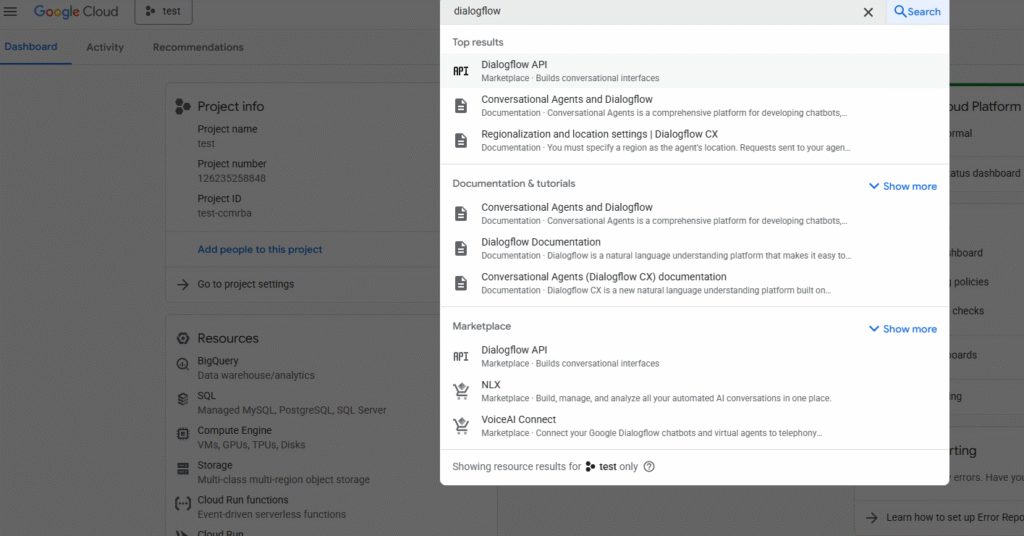
Once on Google Cloud Platform, search for dialogflow. Select the Dialogflow API as shown in the image.
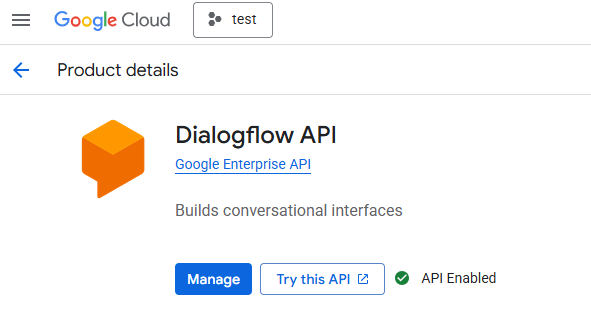
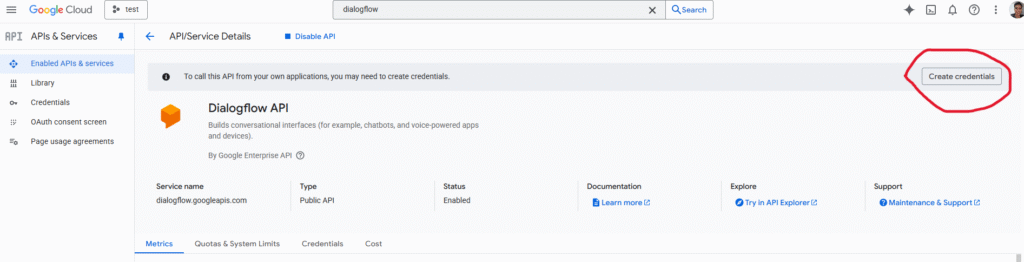
Once pressed, the Dialogflow API screen will appear. Then, press the “Manage” button.
When pressed, a screen will appear as shown in the picture in the “Create credentials” button located in the upper right.
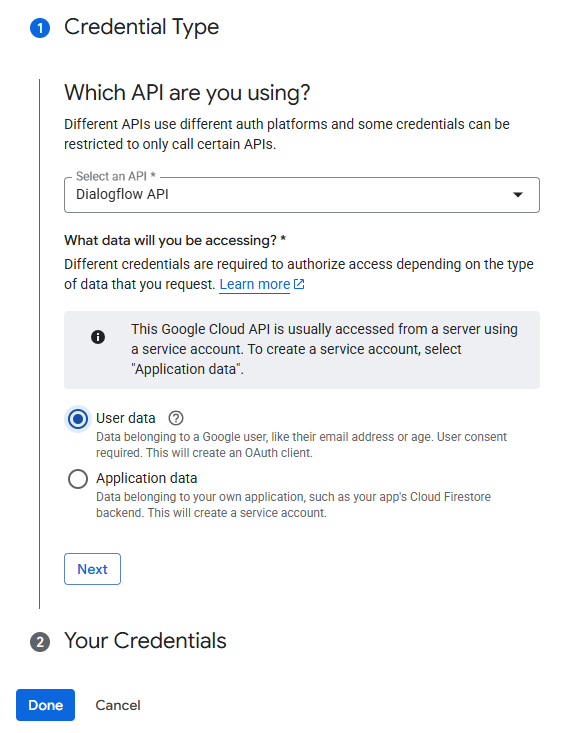
Once you’re on the Credential creation screen, select “User data” as shown in the image and press Next.
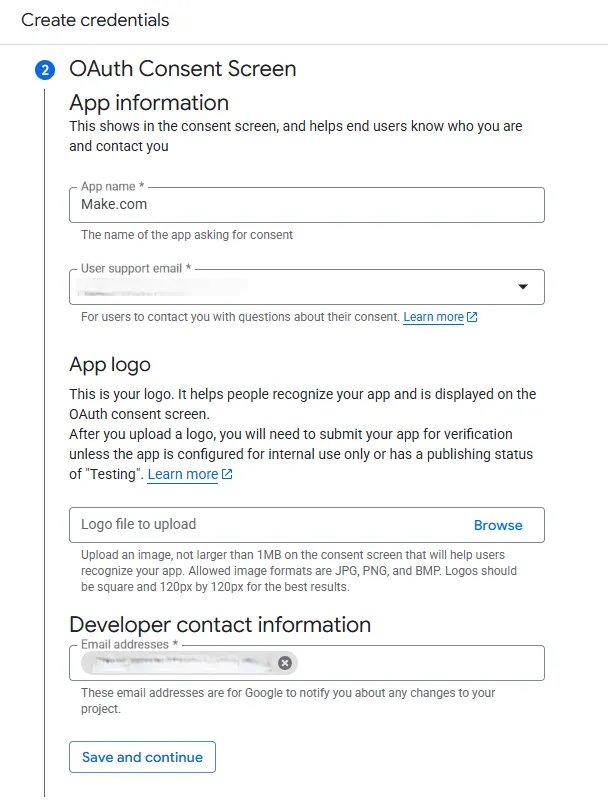
Once pressed, a screen will appear, as shown in the picture, specify the App name and email and press the Save and continue button.
For Scopes, press the Save and continue buttons, and the screen will appear as shown in the picture.
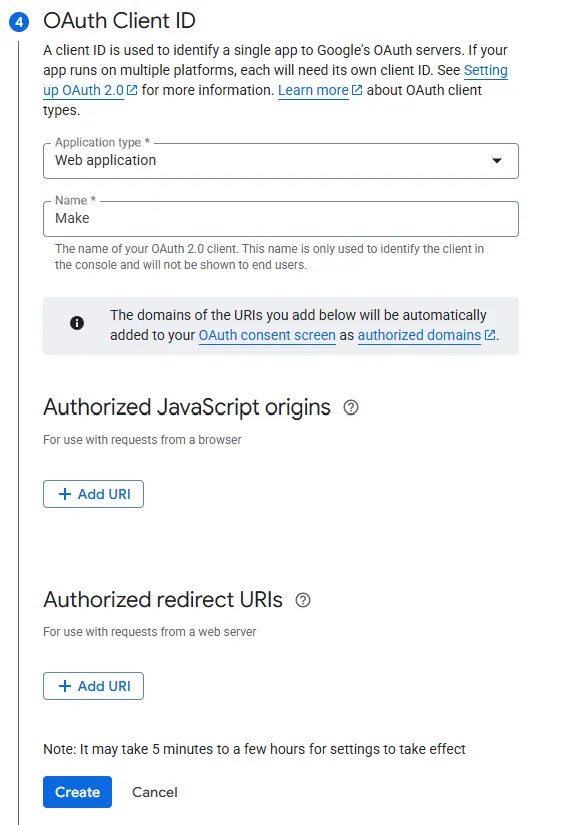
On this screen, select Application type as Web Application and enter a name, then press the “Create” button.
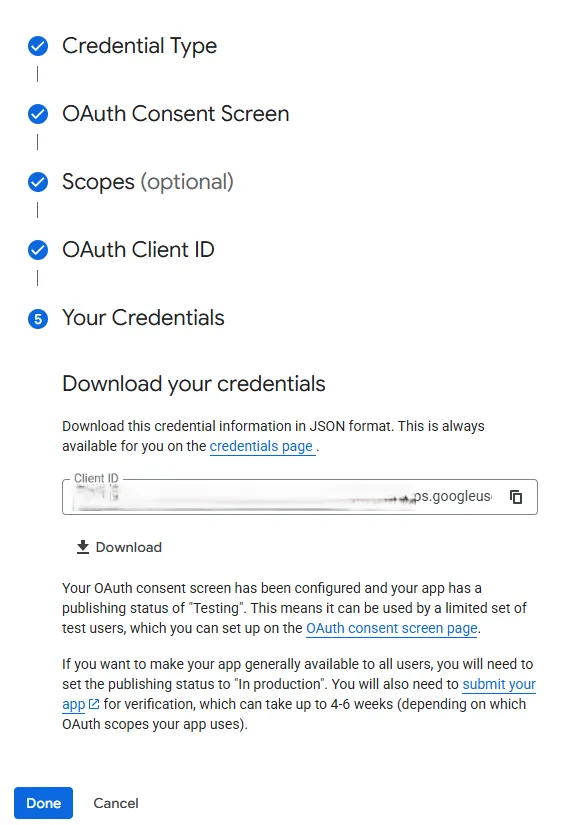
At this point, we will get the Client ID, press the Done button. Then click “Credentials” menu in navigation in the left side. And then click “Make” app in OAuth 2.0 Client IDs as shown in the picture.
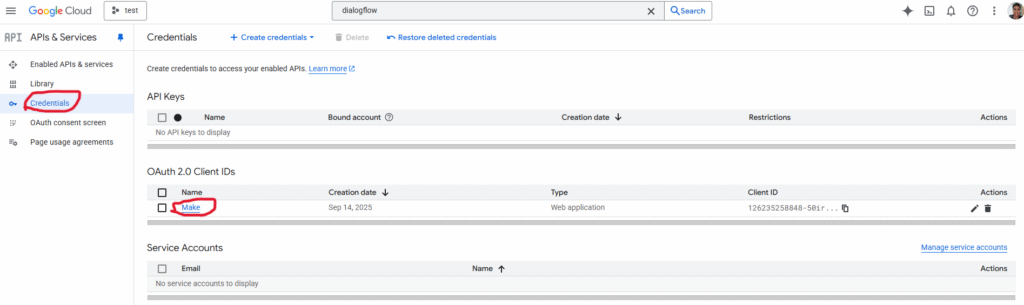
At this stage we will find the Client ID and Client Secret.

At this point, there is still one step left: adding Authorized redirect URIs to add https://www.integromat.com/oauth/cb/google-custom
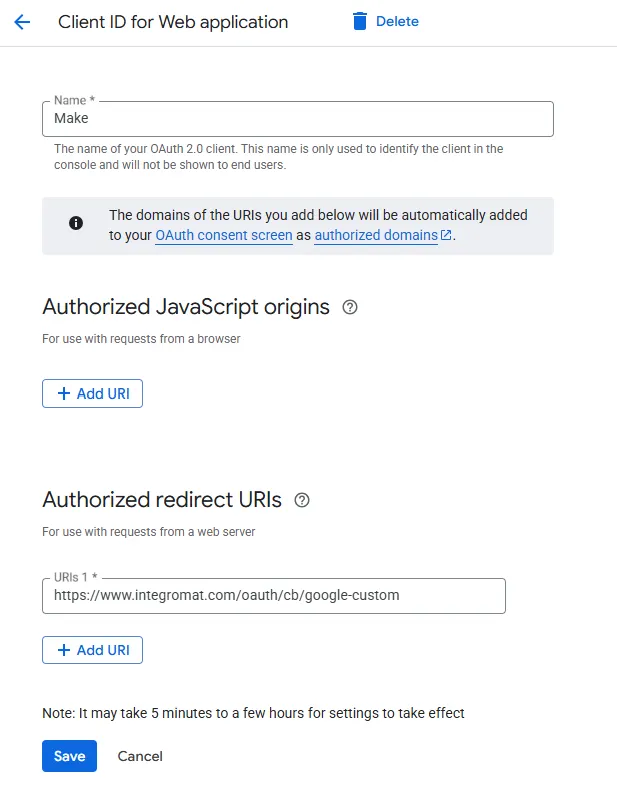
Then, copy your Client ID and Client Secret into the Make.com as shown in the picture, and don’t forget to click Save in the Credentials section where the Authorized redirect URIs are added.
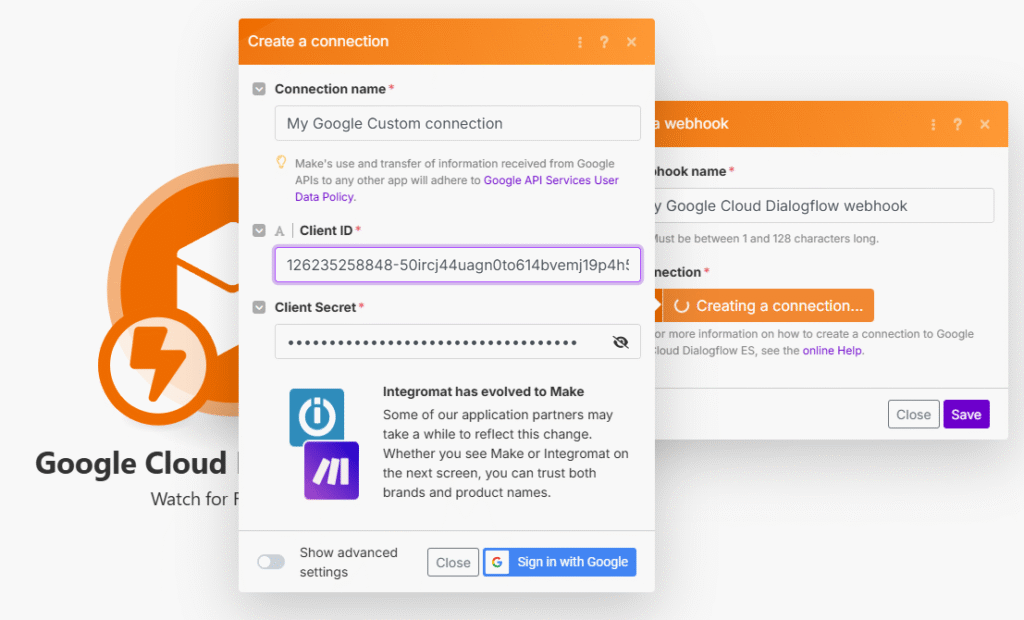
Once the Authorized redirect URIs section is saved, go to the Make.com and click the Sign in with Google button and select the email used to create the agent in Dialogflow.
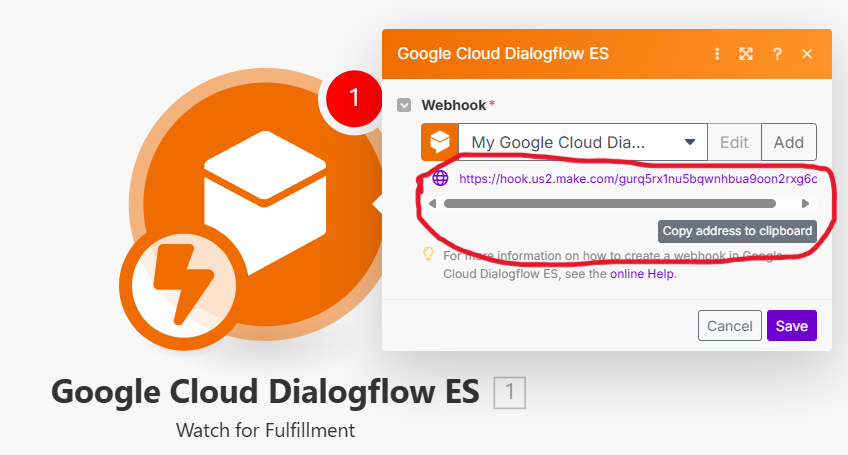
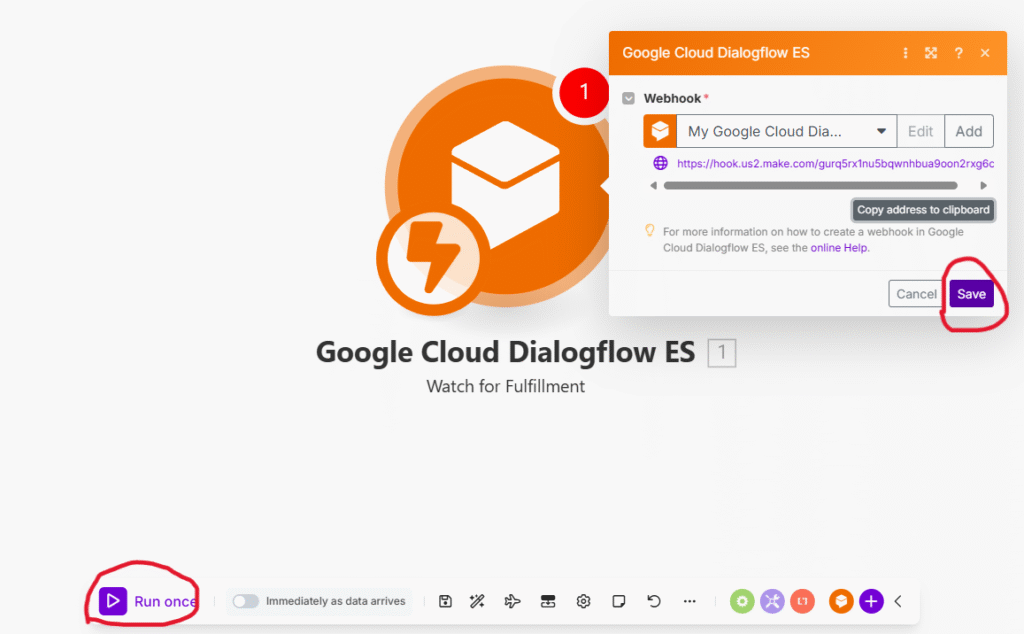
When you press the Save button, a screen will appear as shown in the picture, which shows the webhook to be copied to be stored in the Dialogflow Fulfillment.
3. Manage Responses in Default Fallback Intent and Enable Fulfillment
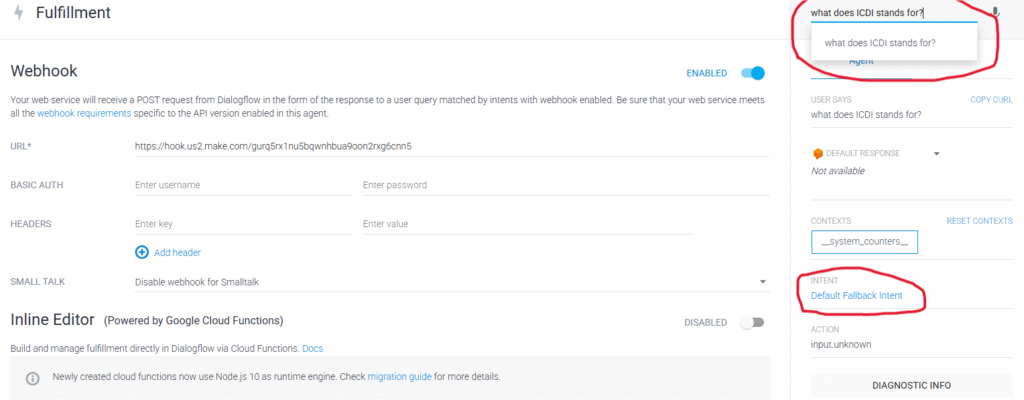
Once we’ve reached the “Default Fallback Intent“, go to the Responses section to delete all the data used in the response and activate the fulfillment as shown in the image.
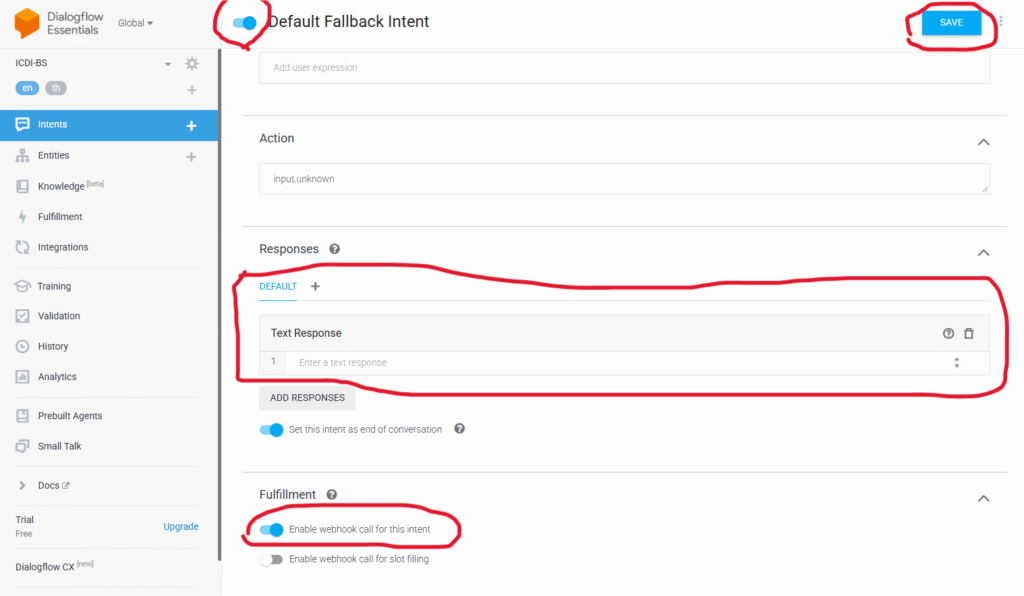
We do this because we don’t want Dialogflow to answer any data back, but instead send the question to the Make.com for processing through fulfillment. Now, if we send any message or question to Dialogflow, there will be no reply.
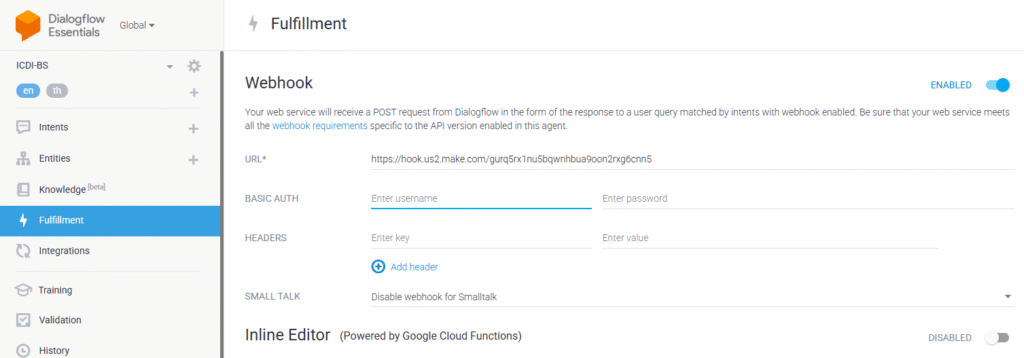
Then, take the webhook from the Watch for Fulfillment module and enter it in the URL field in the Fulfillment menu as shown in the image, then press the “Save” button at the bottom.
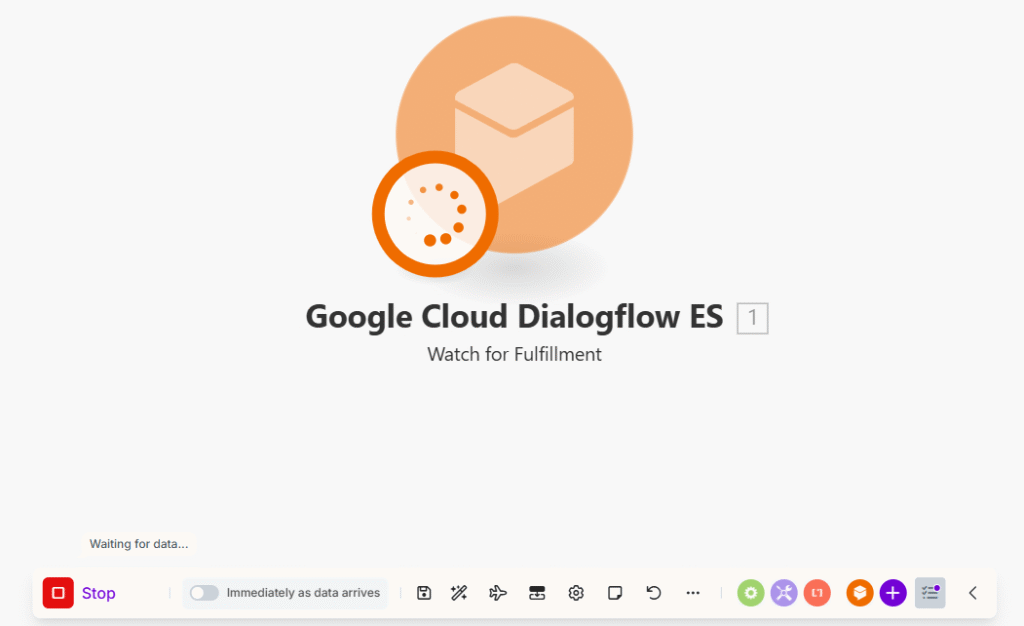
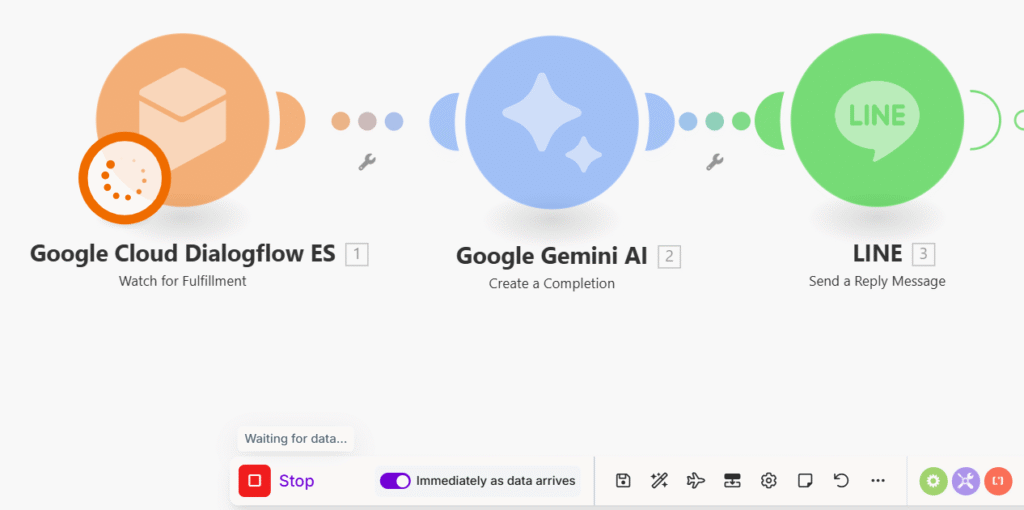
Try testing it by pressing the Run button once.
When pressed, it will be displayed as shown in the picture.
Try sending any non-intent messages in Dialogflow, which will go to the Fallback Intent and forward it to make.com.
4. Use of the “Google Gemini AI (Create a completion)” module
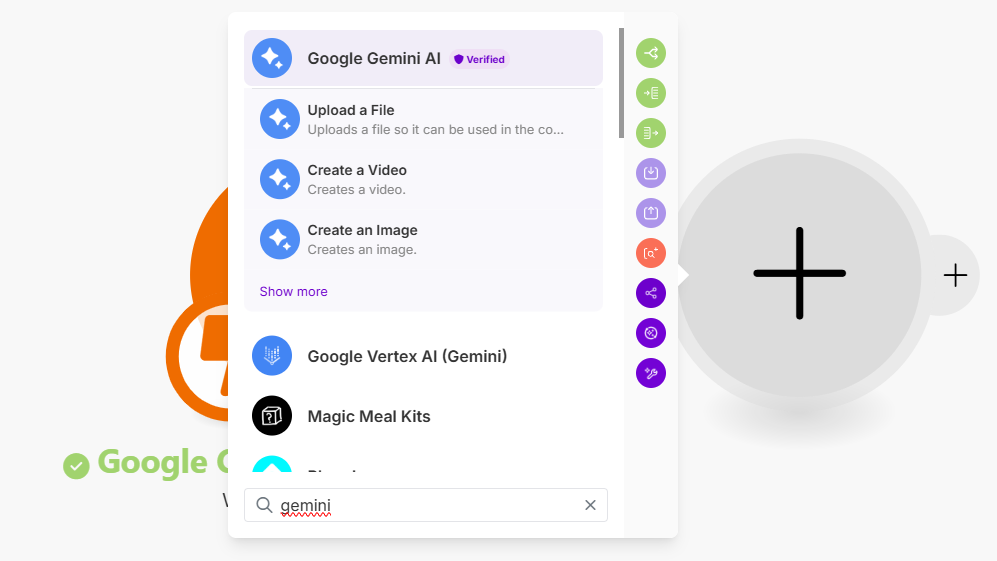
Press the + button to add the module as shown.
Search for Gemini and choose “Show more”, and then select module “Create a Completion” as shown in the image.
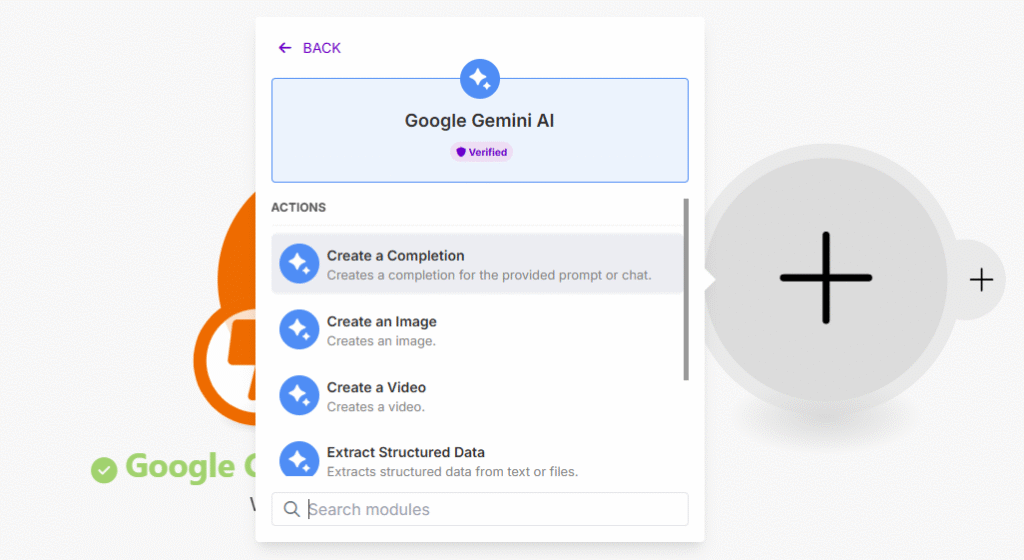
Once selected, a screen will appear, as shown in the picture.
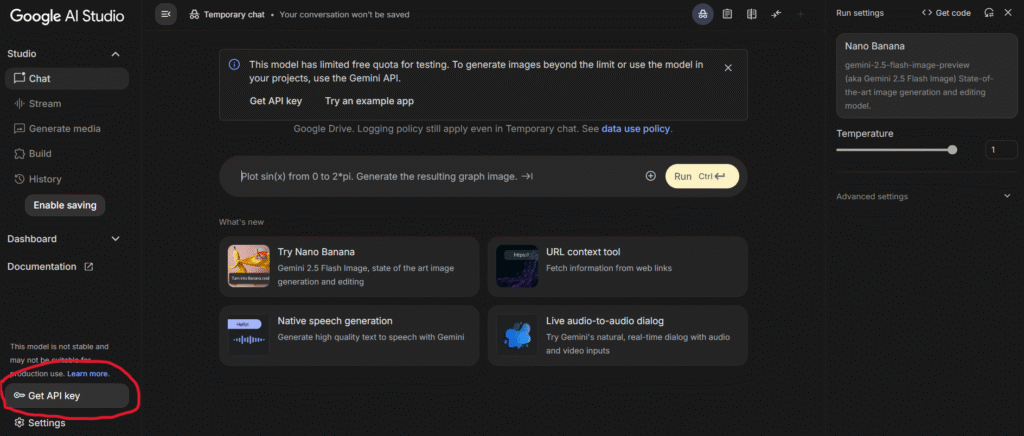
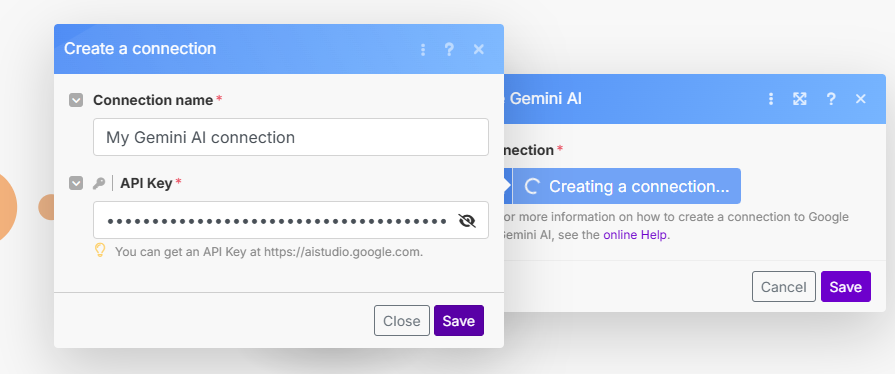
If you don’t have an API key, go to https://aistudio.google.com/ and sign in with the account you used to create an agent in Dialogflow as shown in the picture, then click the “Get API key” button.
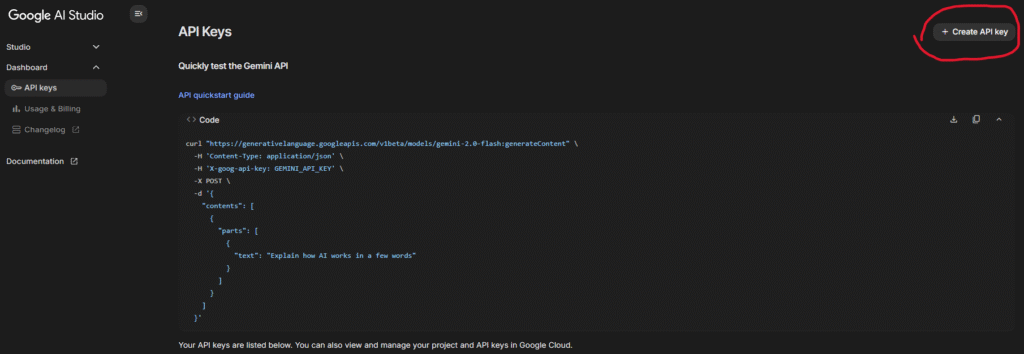
Then the screen will appear as shown in the picture, press the “Create API key” button.
Then, select the project you use, and then press the Create API key in existing project.
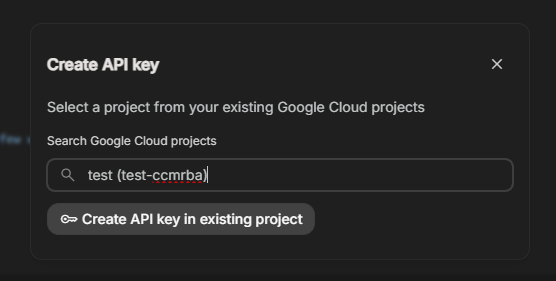
Note: Other Project API keys can be used. It doesn’t have to be the same project as Dialogflow.
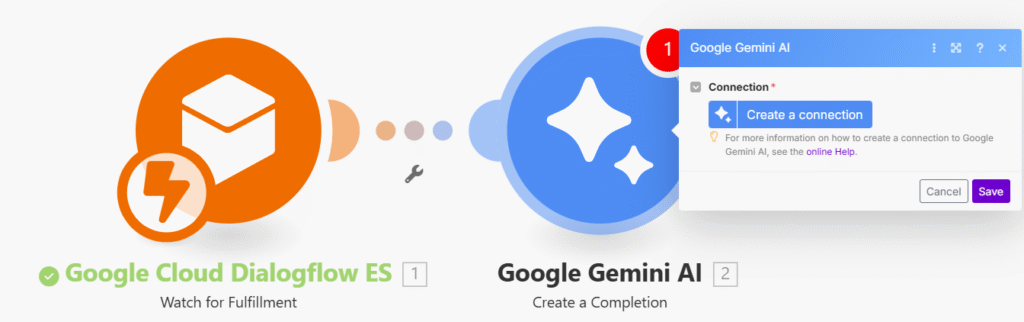
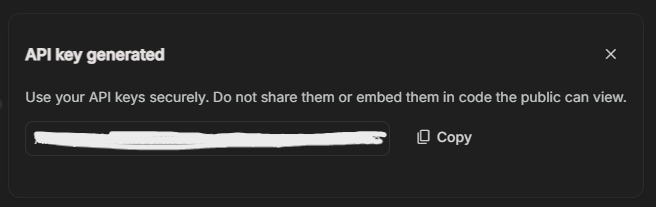
Once you get the API key, copy it. Then go back to Make.com, click “Create a connection” button and paste the API key as shown in image. And click “Save” button.
Then, select the Model such as Gemini 2.5 Flash, then select (Model) Input as shown in the image, which will assign the role to this module.
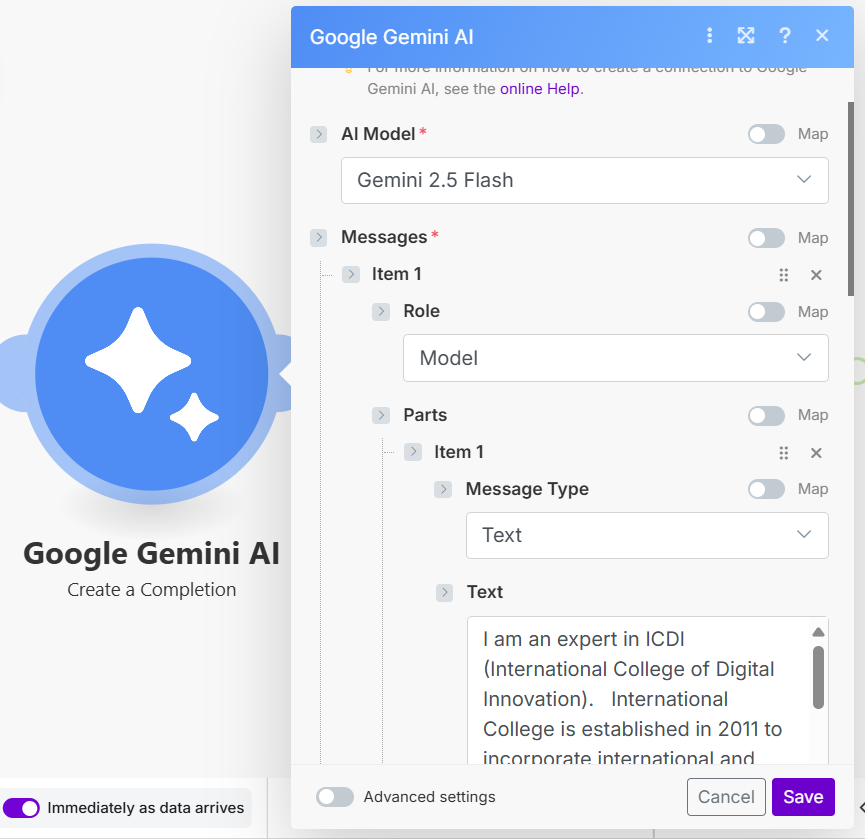
Note: The text can be copied from the content below. You may change this text according to your business information.
“I am an expert in ICDI (International College of Digital Innovation). International College is established in 2011 to incorporate international and bilingual undergraduate programs in Chiang Mai University (CMU). The main academic mission is to facilitate student mobility in ASEAN and Europe. CMU practices ASEAN University Network Quality Assurance (AUN-QA) and ASEAN Credit Transfer System (ACTS) as well as European Credit Transfer System (ECTS). To facilitate the best practices, International College has support roles to other academic faculties in student mobility with credit transfer, Inbound and Outbound visiting professor exchange, Cross Border Co-Research with ASEAN+3 university partners, Common European Framework Reference in English for General Education and Free Elective courses, student leadership program and, other infrastructure and activities for international students in CMU. In CMU, International College plays as the major mechanism for internationalization. Therefore the college assists CMU academic departments to acquire international funding for student and staff exchange in AUN-ACTS, AIMS (ASEAN International Mobility Students), EU-Share and Erasmus Plus as well as Horizon 2020. Other target international scholarships and funds include New Columbo Plan, China Scholarship Council, Reinventing Japan, Korea Foundation, DAAD, Franco-Thai and Newton fund, etc. International College also helps international students to engage the local funds including CMU Presidential Funding, TICA and other Thai government international funding. In 2017, International College has been enhanced her academic roles to entrepreneurship and digital innovation. The enhanced mission directly responds to the Thailand 20 Years Strategic Plan in digital startup especially Digital Economic Cluster for Chiangmai. This aims at development of TransNation Education with leading entrepreneurship and innovation universities in United Kingdom, Australia, China, Korea, etc. The new International College of Digital Innovation (ICDI) offers bachelor, master, doctoral programs in digital innovation and financial technology. Besides the major courses, ICDI also offers General Education and free elective courses in digital entrepreneurship literacy to any CMU students in other faculties. This helps students to learn disruptive digital technologies for engaging new digital economy and society. Today ICDI has 2+2 dual degree programs in entrepreneurship with University of Strathclyde and East China University of Science and Technology. As well as in data analytic, ICDI collaborates with Curtin University and University of Electronic Science and Technology China. To encourage digital startup, ICDI provides academic and training programs for entrepreneurship and innovation. The digital innovation process for SMEs and startups consists of Discovery, Development, Diffuse and Impact by Big Data, mobile application, social network and financial technology respectively. Fundamentally ICDI is doing research and development in cross border e-commerce, logistics and FinTech to bridge Chinese platforms to western platforms for Thai, Chinese and international students. To conduct policy research in entrepreneurship and innovation by using machine learning, research study is based on Supply Side Structural Reform for improving inputs factors for SMEs and startup in new digital economy and society. The intervention of very high-speed broadband Internet such as 4G is the main consideration. The input factors are categorized into land, labor, capital and entrepreneurship and outputs are measured by United Nation Human Development Index which consists of life expectancy, knowledge and net income. By Schumpeterian Cobb-Douglas approach, the creative destruction theory is employed for study of the 10 new S-curve industries of Thailand. The machine learning techniques are used for developing predictive models of decisions, policies, strategies or projects to improve some input factors for the industrial cluster of SMEs and startups. After word, Big Data technology can be utilized for online monitoring the outcome.”
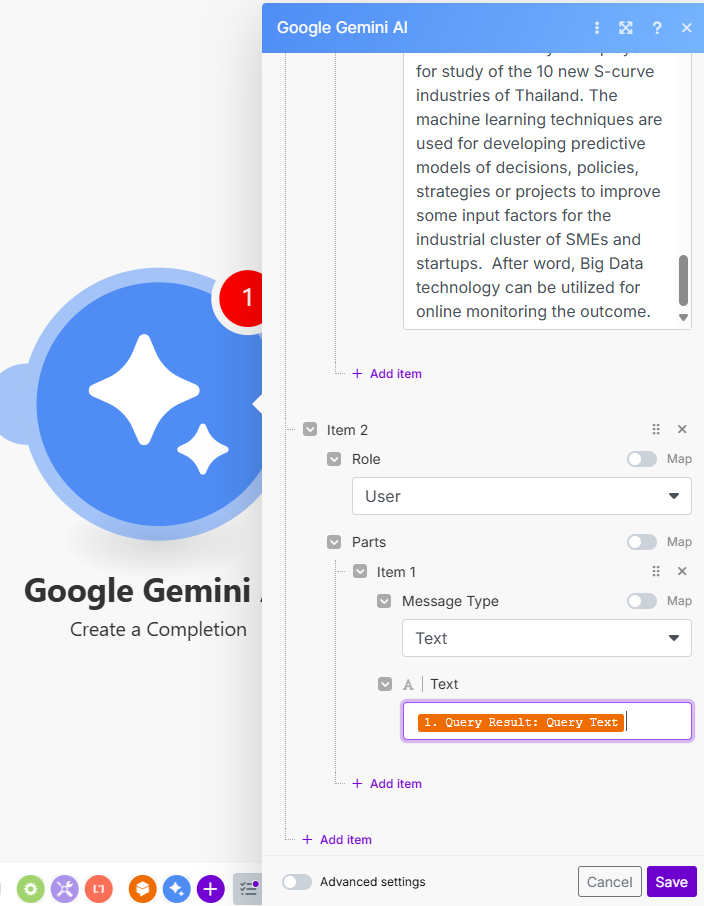
Then, press the Add item button, select the (User) details as shown, then press “Save”.
5. Using the “LINE (Send a Reply Message)” Module
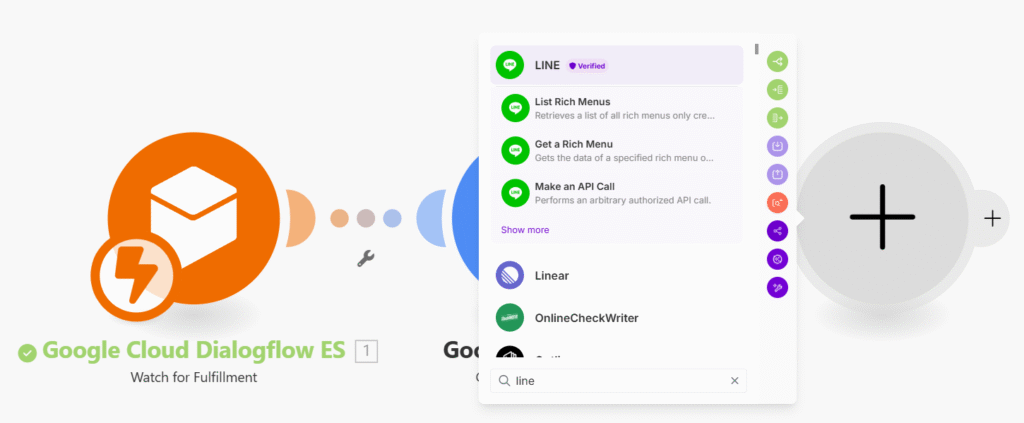
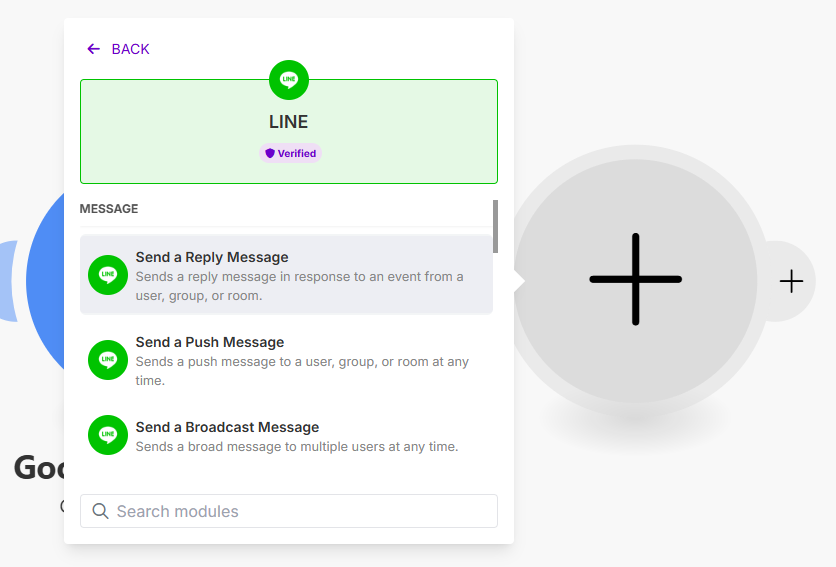
Press the + button to add a module and search for LINE as shown in the picture.
Then click Show more to select “Send a Reply Message” as shown in the picture.
Once selected, a screen will appear, as shown in the picture.
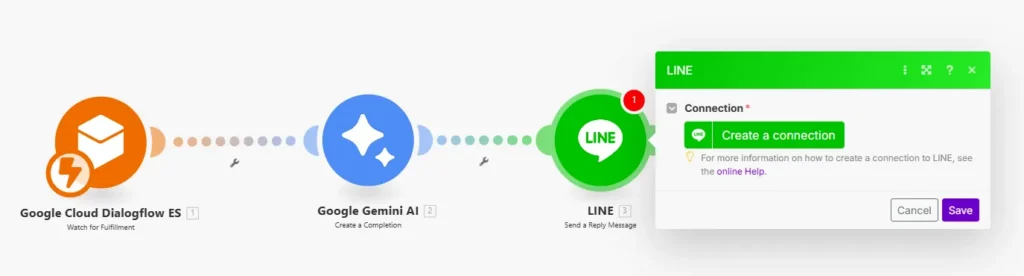
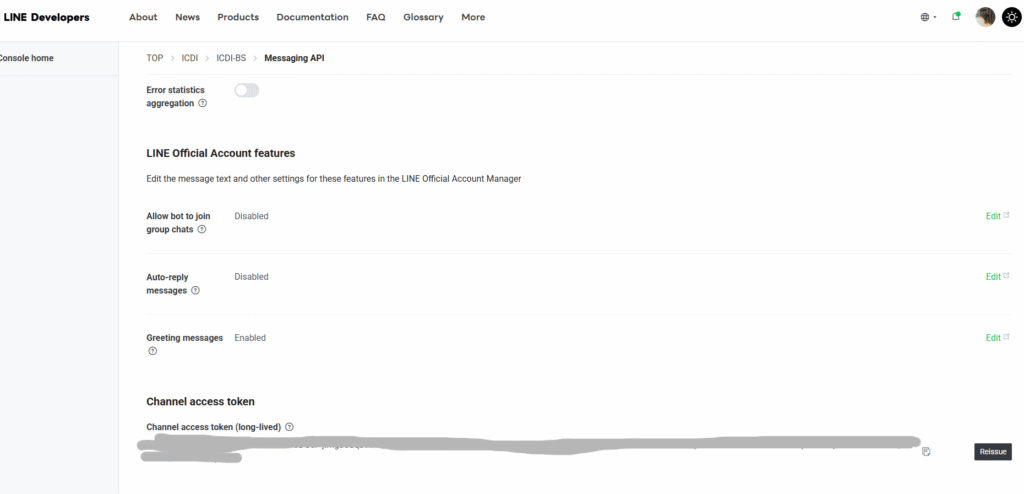
Press the “Create a connection” button, and a screen will appear to enter the “Channel Access” Token from https://developers.line.biz/.
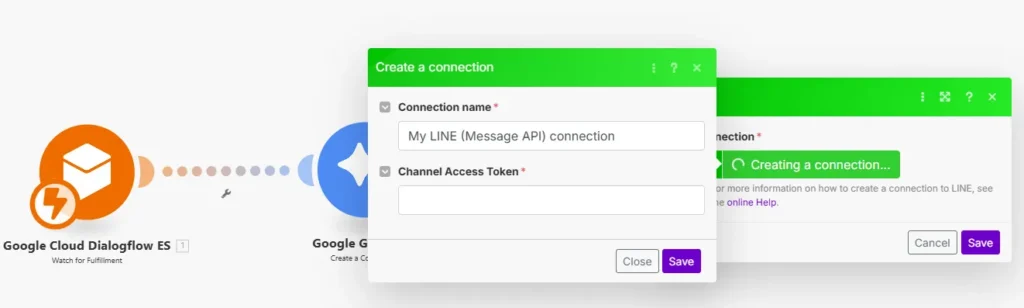
When you enter the Channel Access Token and press the “Save” button, the screen will appear.

Select Reply Token and Reply by example as shown in the show.

In case you could not see “replyToken” in “data“, try to click the “Run once” button at the bottom.
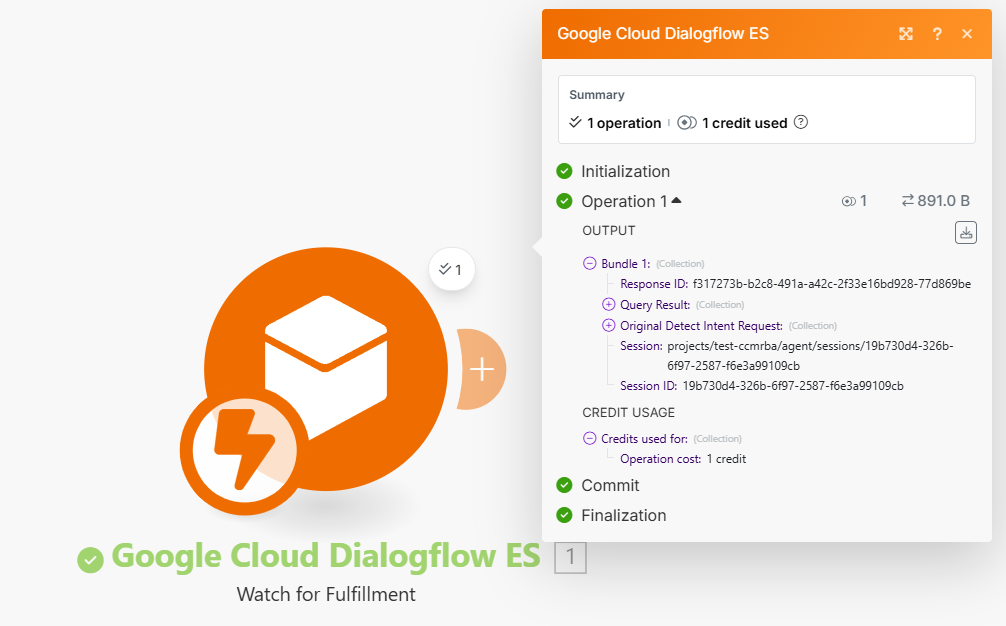
Then you will see the component “Google Cloud Dialogflow ES” is running and waiting for the input (in feedback intent) as image below.
You then can type in your chatbot with any messages that will go to your fallback intent (which is not in your created intents). Once the “Google Cloud Dialogflow ES” is activated, you will be able to see “replyToken” under “Original Detect Intent Request” -> “Payload” -> “data”. Now you can just drag and drop the “replyToken” element to “Reply Token”.
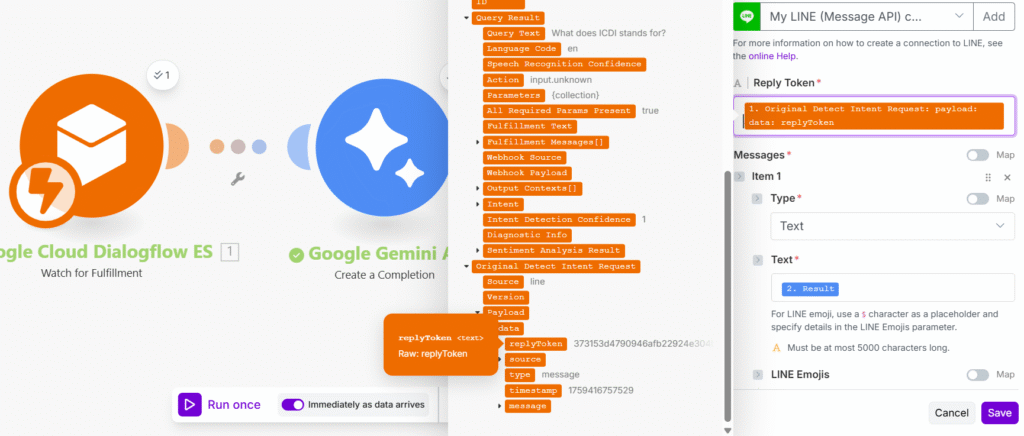
According to the example, the Reply Token forwarded from Dialogflow will be used in the reply by using the result from Gemini, which when the example is specified, press the “Save” button and then test the chatbot.
Once Save, a screen will appear as shown in the picture.
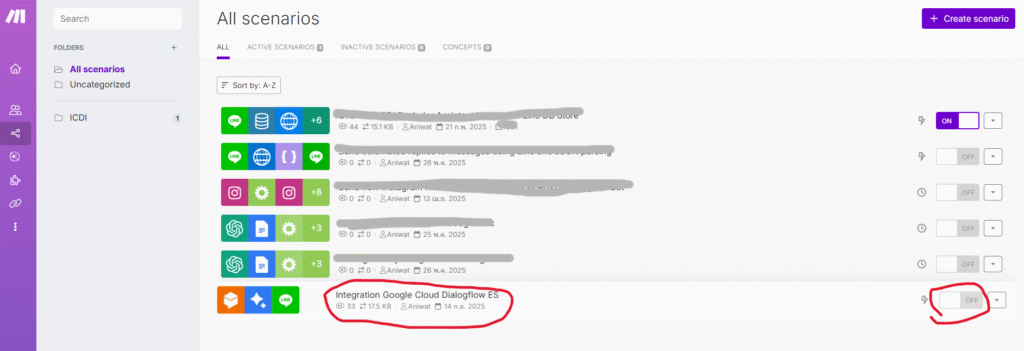
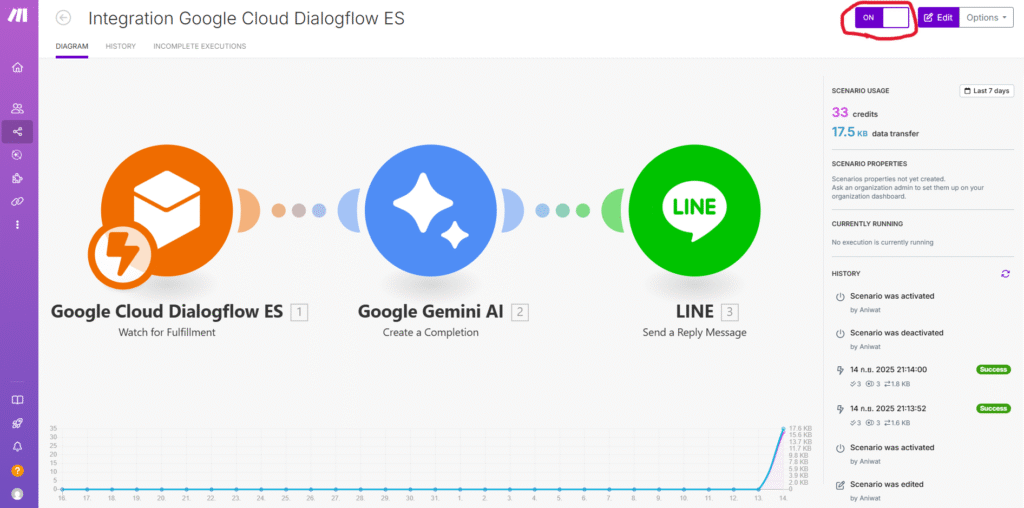
Select the Scenario that you created, and then activate this Scenario, as shown in the image.
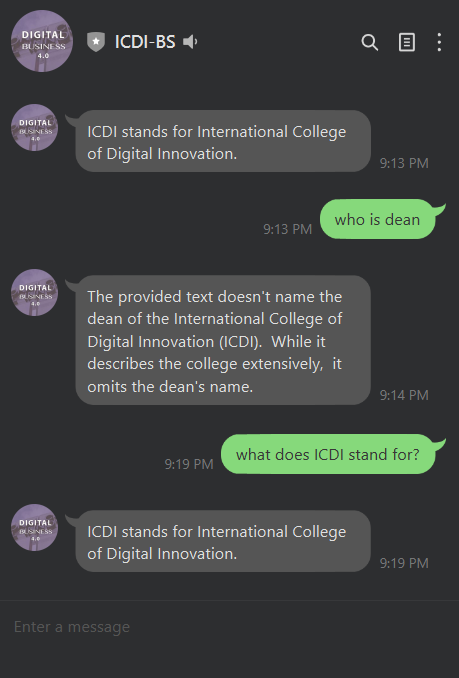
Then type in a sample question, such as “what does ICDI stand for?”. The system will help answer the required information, but if asked, “who is dean?” the system will answer, “The provided text doesn’t name the dean of the …” which is according to the prompt set.
Error Handling
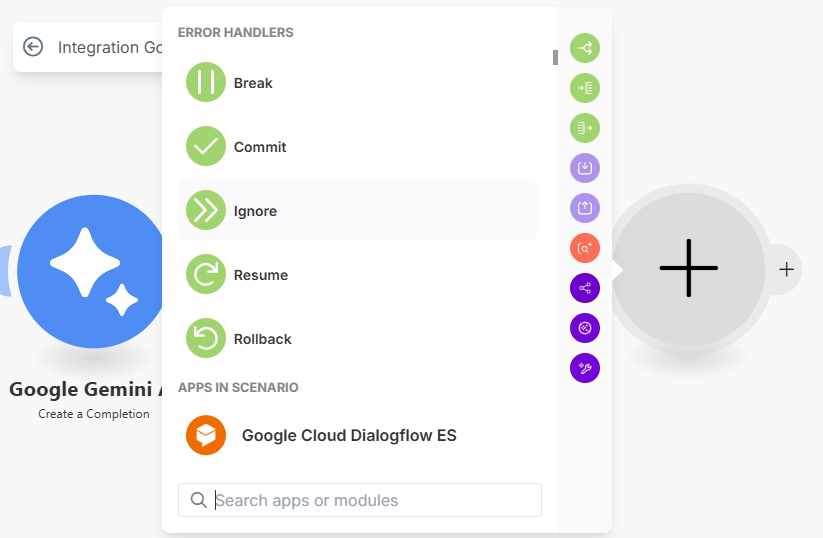
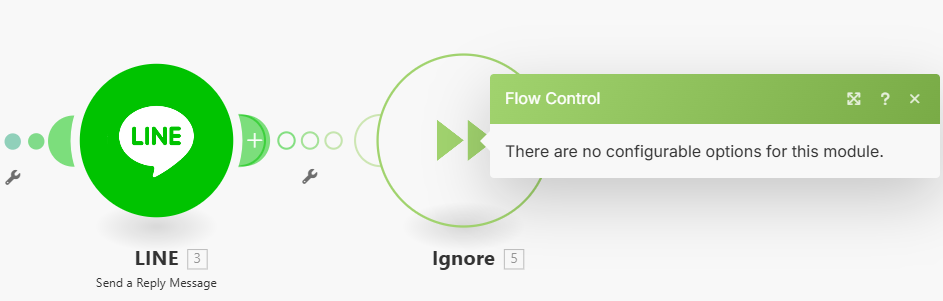
To prevent the scenario automatically is stopped after any face problems. We can “Add error handler” module after “LINE” module.
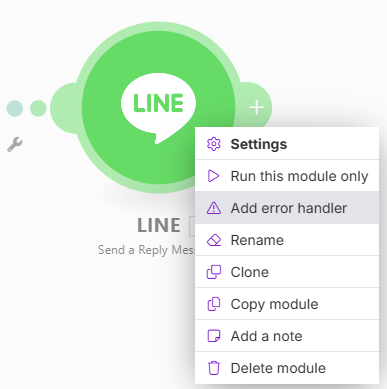
Choose “Ignore” module
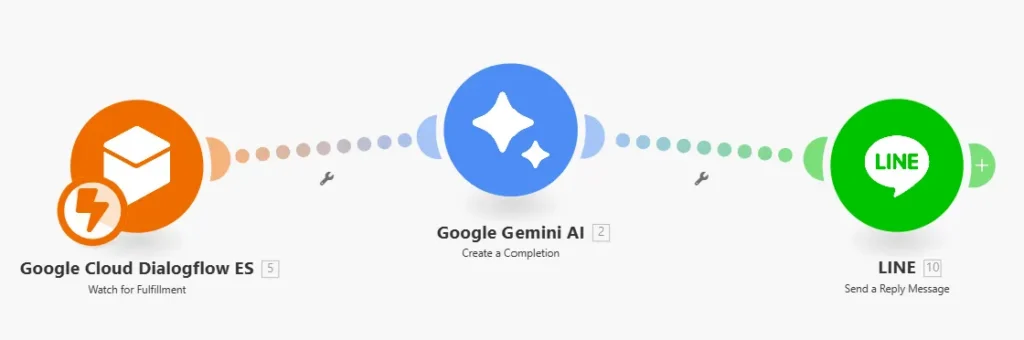
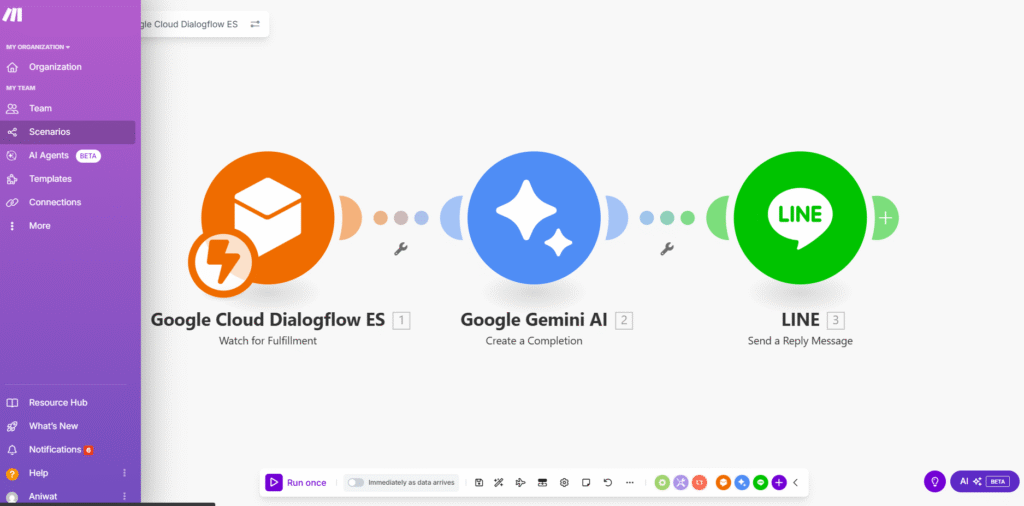
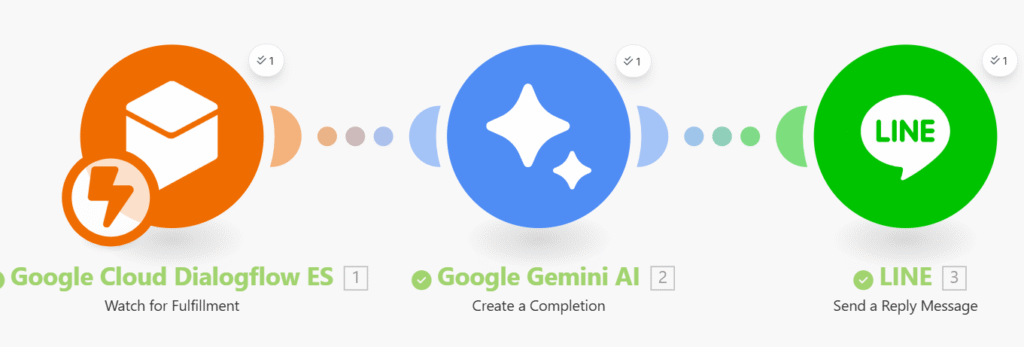
Finally, the full workflow will be shown as following figure:
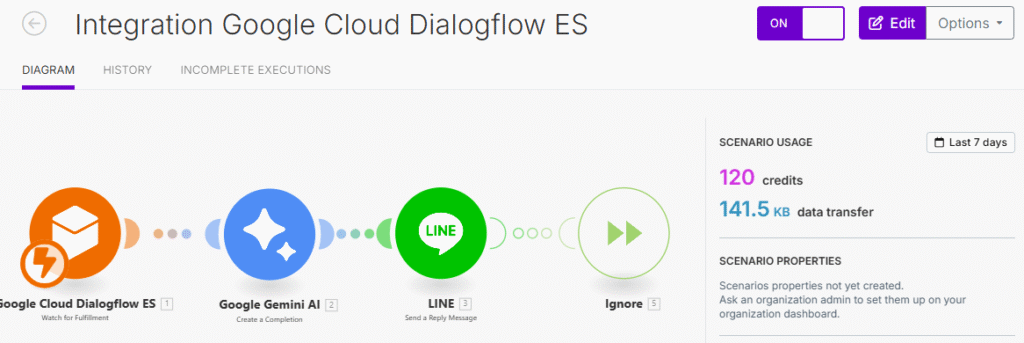
In this article, we explain the process of using the Make.com platform as an intermediary to connect work processes by receiving data from Dialogflow Fulfillment, processing it with Gemini, and replying with a Reply Message.
References:
- https://medium.com/linedevth/integrating-line-chatbot-with-dialogflow-and-gemini-ai-via-make-com-8b30e977fe18
- ทำ LINE Chatbot เชื่อมกับ Dialogflow และ Gemini โดยเลือกถามคนหรือถามบอทได้ ตอนที่ 1 (LINE เชื่อมกับ Dialogflow โดยตรง)
URL: https://shorturl.at/FpIFa - Youtub ทำตาม บทความของคุณตี๋ “สร้าง LINE Chatbot x Gemini” https://www.youtube.com/watch?v=7sGOkYhdEOc